Workflow Builder
The Workflow Builder is where you design how Confluence pages move through states like Draft, In Review, and Published. Reviewers, expirations, automatic actions, and the custom data a page carries are all configured here.
Opening the builder
Section titled “Opening the builder”The builder lives in two places. From Apps → Aura Workflows → Workflows at the global level, you build templates available across the whole instance. The same option in a space’s settings opens a builder scoped to that space. Both surfaces list existing workflows as cards with a Create workflow button at the top right that opens the builder in a full-page modal.
A new workflow starts from a template. Aura Workflows ships three pre-built ones (Basic Approval, Content Gardening, and Compliance) alongside a Blank option. The templates are working examples meant to be customized; Basic Approval is a sensible default.
The layout
Section titled “The layout”The screen splits in two. The left side is a canvas showing the workflow as a diagram: each state is a labeled box, and arrows between them carry icons identifying the transition type. A checkmark for an approval, an X for a rejection, a split arrow for a manual selection, a pencil for a page-edit transition, a clock for an expiration. States can be dragged anywhere; their positions are saved with the workflow.
The right side is a configuration sidebar that follows your selection. Click empty space for workflow-level settings: name, description, initial state, variables, and metadata. Click a state and the sidebar fills with that state’s properties. Click an action to drill further in, with a breadcrumb back. The save bar at the top right holds Save Workflow, Close, and an indicator showing whether changes are unsaved.
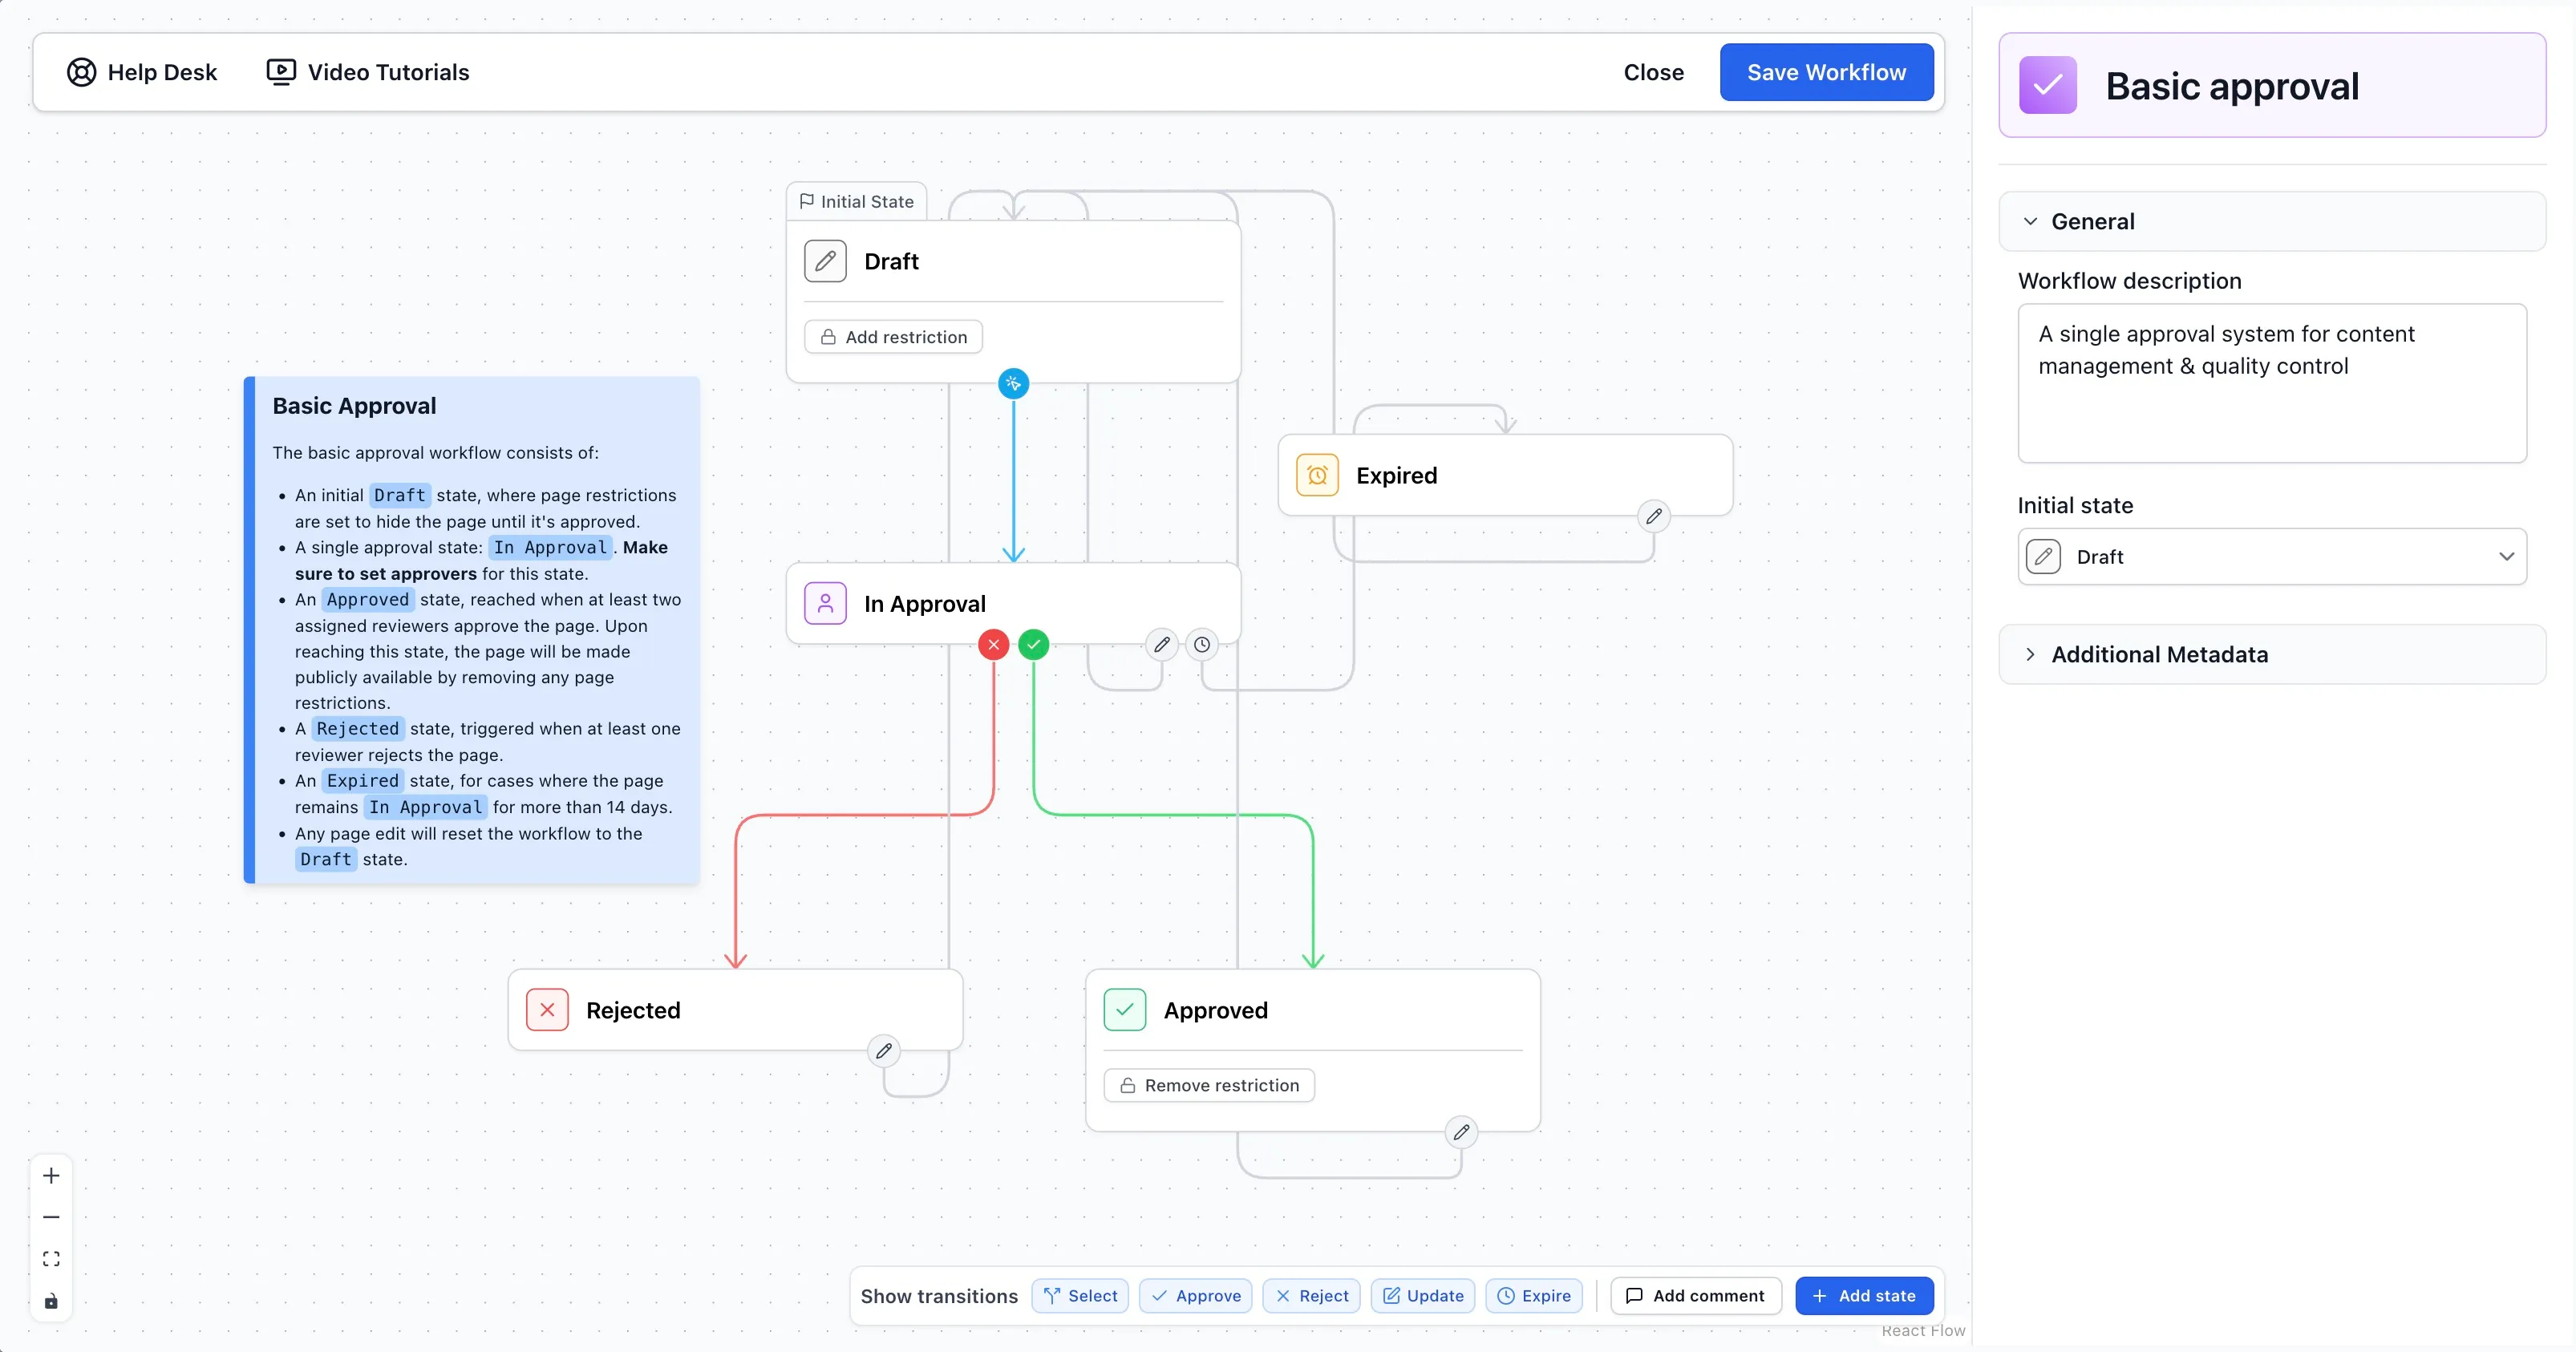
States
Section titled “States”To add a state, click Add state in the canvas toolbar, or drag from a handle on an existing state into empty space. Aura Workflows creates the new state and connects it for you. Click a state to edit its name, icon, and color, plus the three sections that define its behavior.
Actions lists what runs automatically when a page enters the state: sending an email, publishing the page to another space, adding or removing restrictions, applying or stripping labels, bumping the official version, or modifying the page title. Click Add action to pick a type. Actions in a state run in three phases (remove-restriction first, then everything else in parallel, then publish-page last), and within a phase there’s no guaranteed order. Each action type is documented on its own page.
Events covers the two ways a page can leave a state without anyone clicking a button. On page edit transitions when someone edits the page, useful for sending a published page back to review on changes. On expiration transitions after a fixed duration or on a specific date, optionally with annual recurrence. Both can send a notification email so the move isn’t a surprise.
Transition to next states has three mutually exclusive tabs. A state either gates progress on an approval, offers a choice of next states, or is terminal.
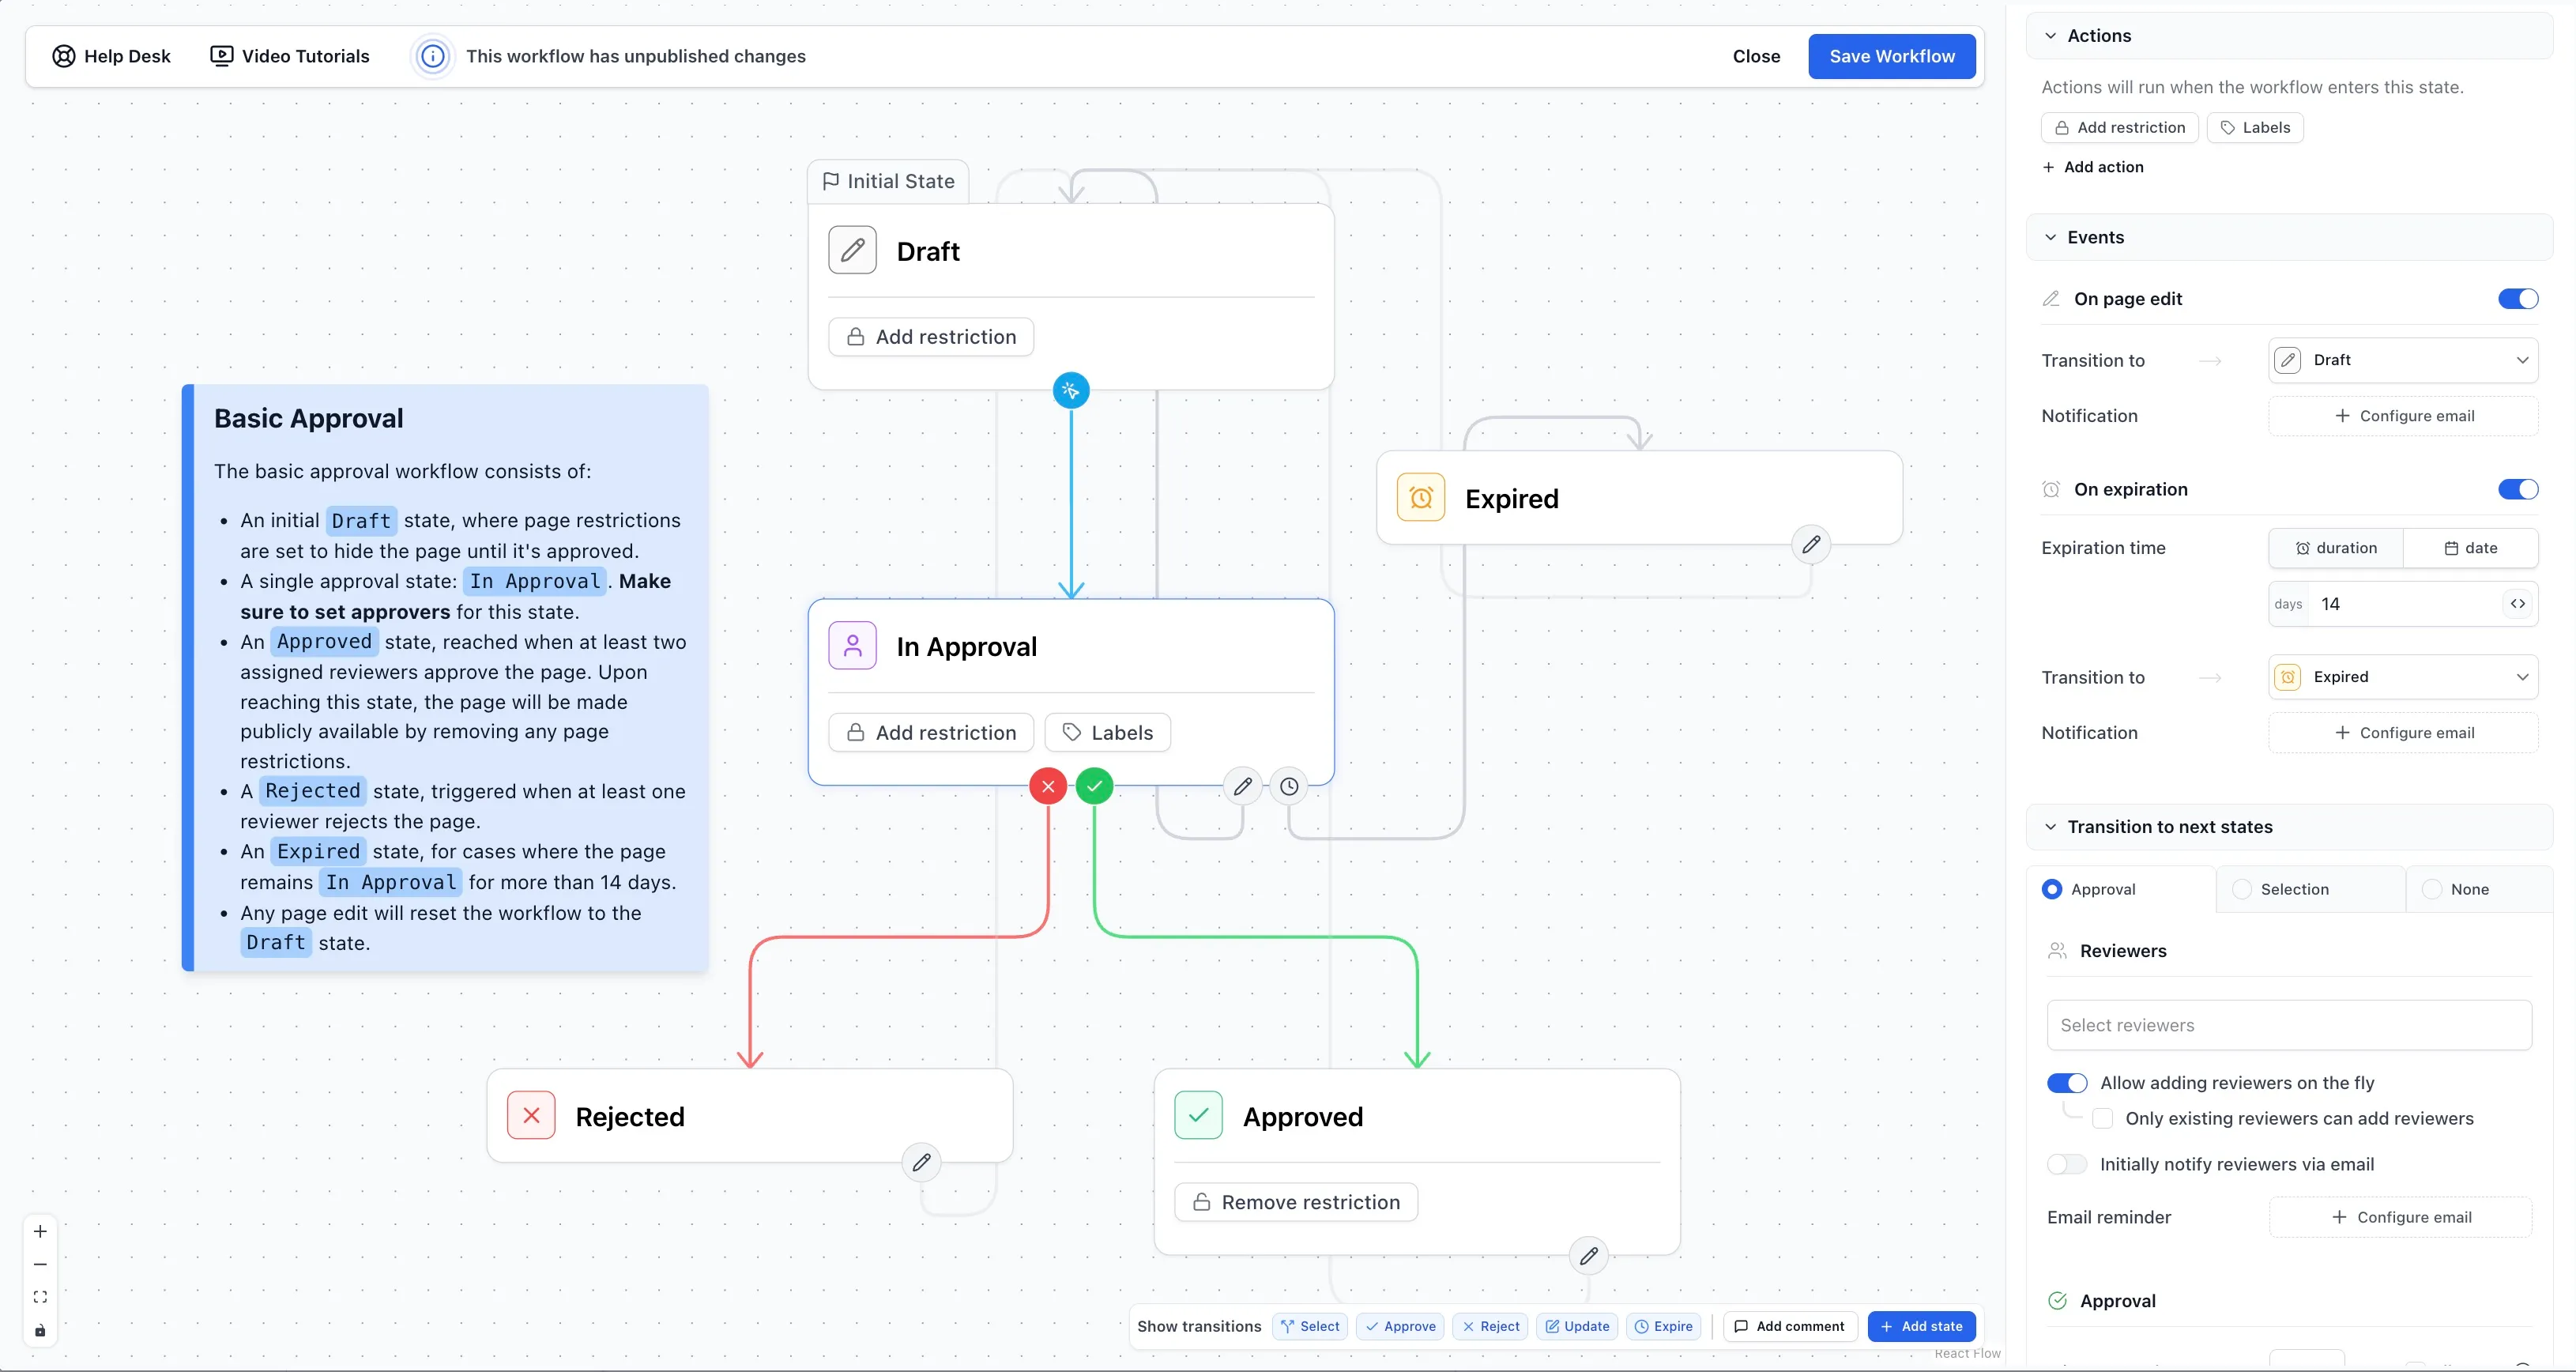
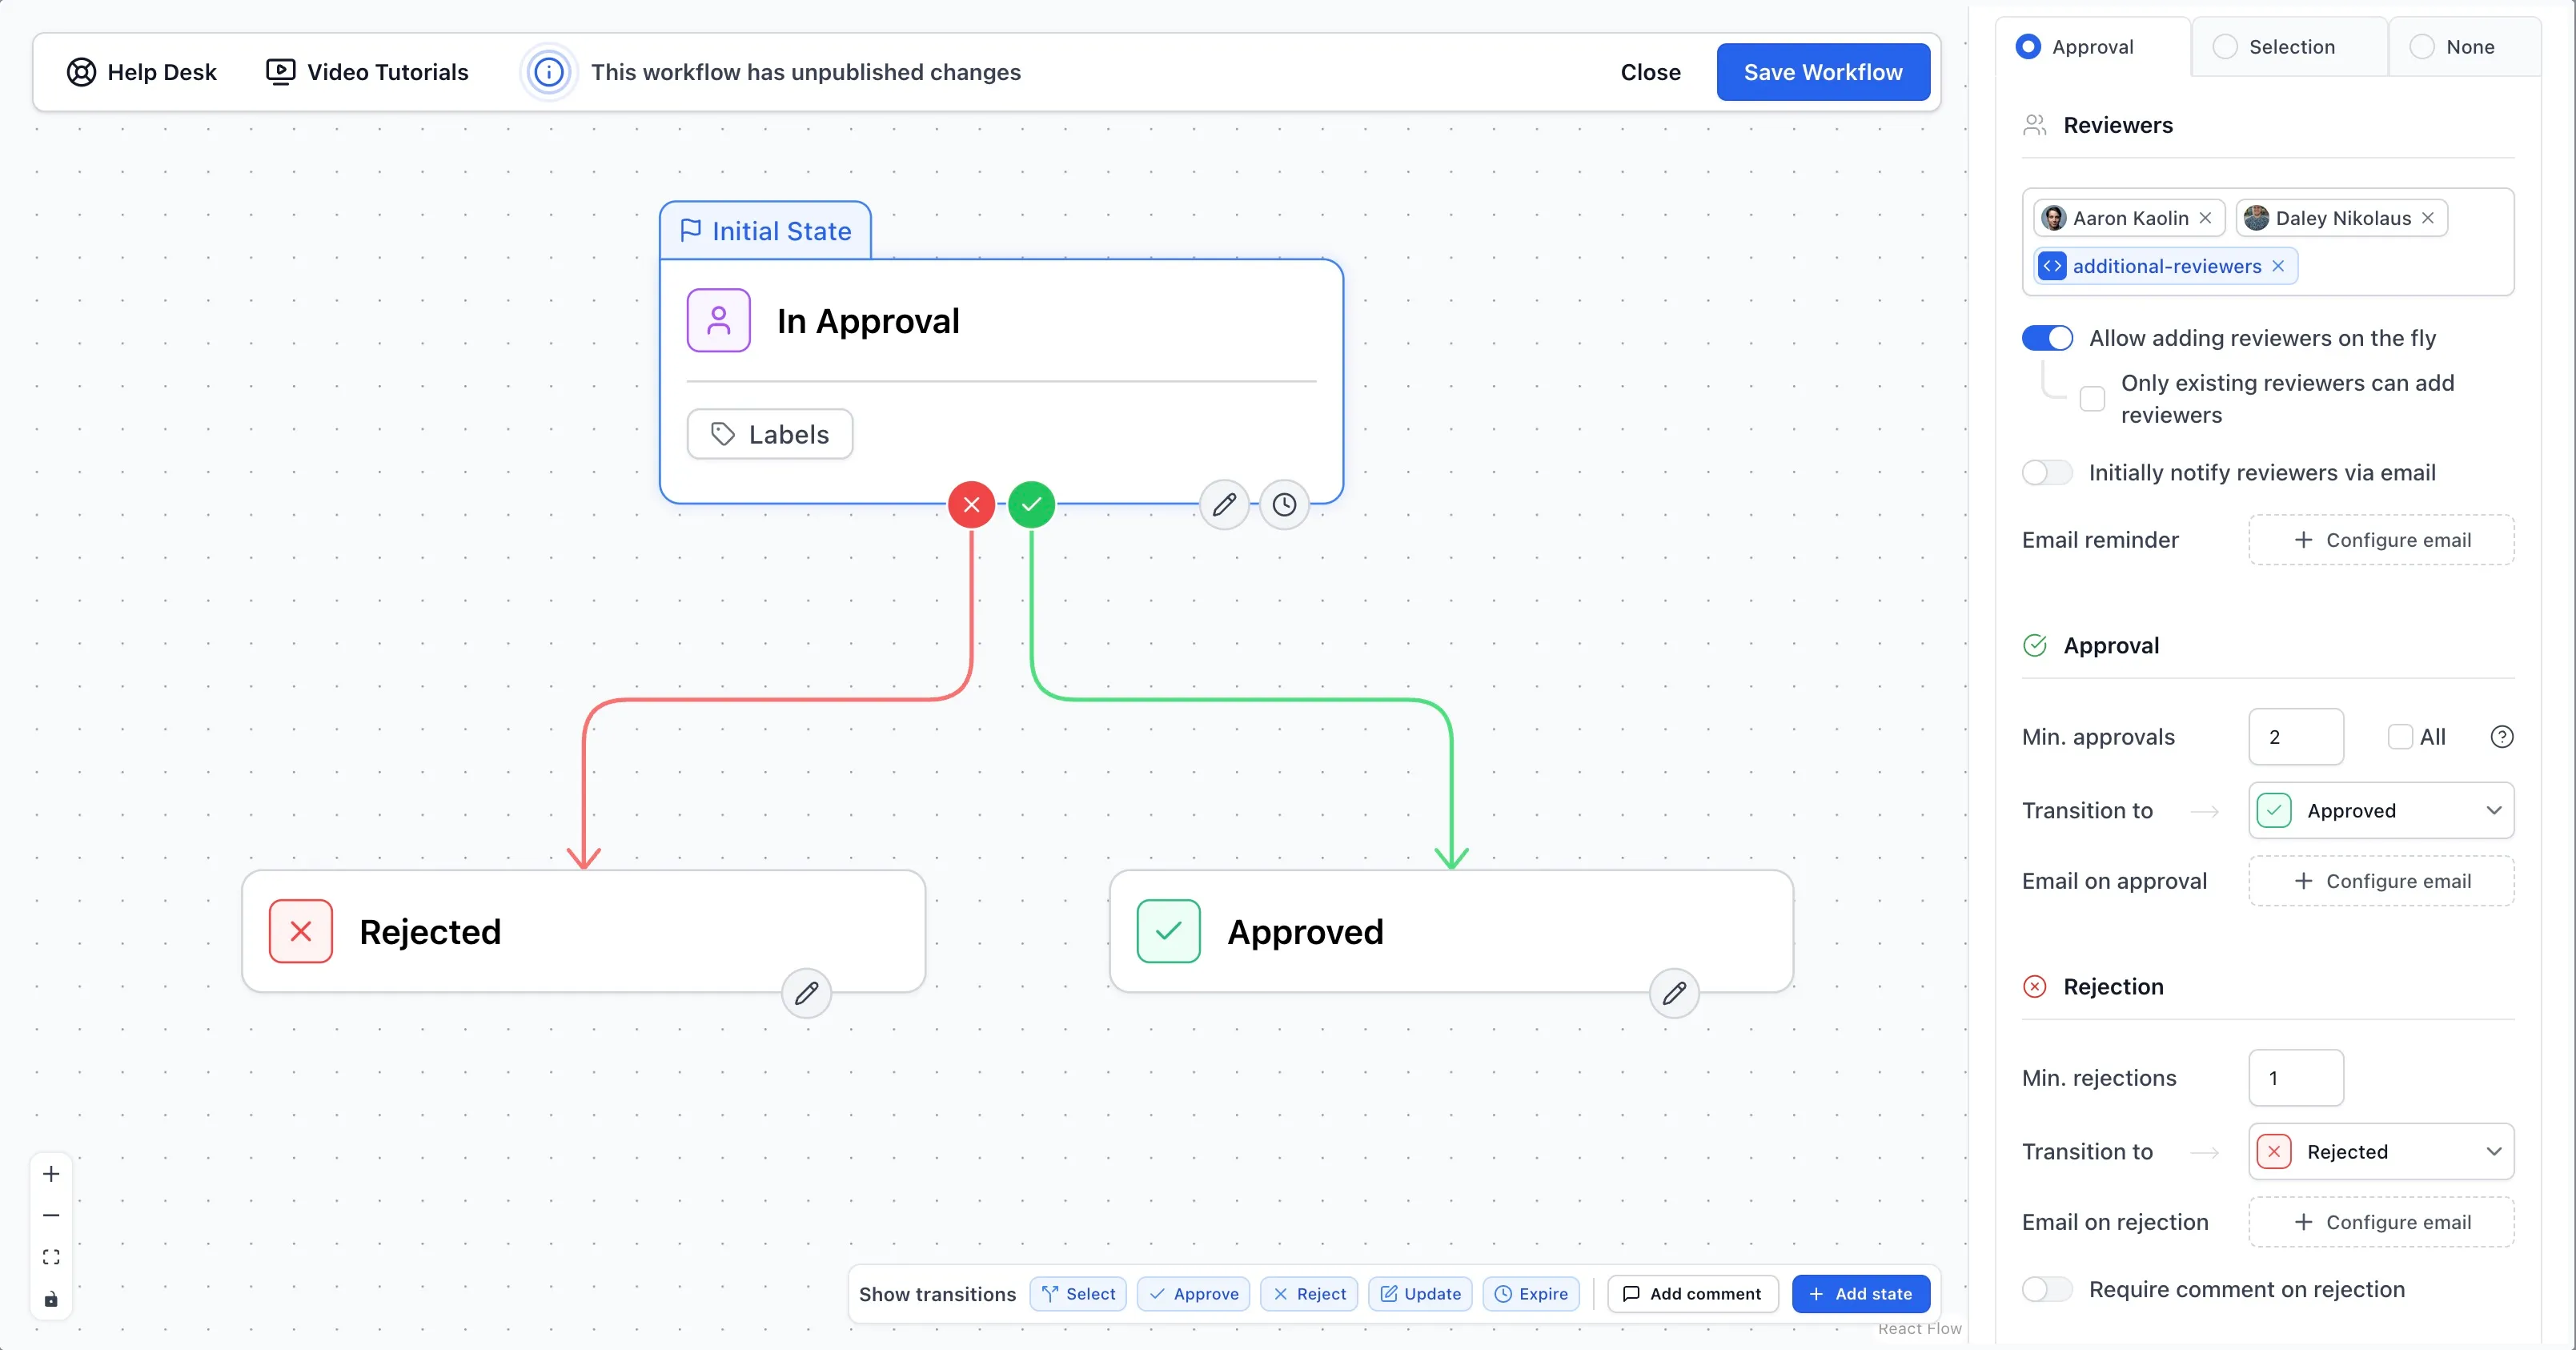
Approval transitions
Section titled “Approval transitions”The Approval tab is where most of a workflow’s policy lives. Pick the reviewers (any combination of users, groups, and workflow variables) and decide whether reviewers can pull others in once the approval is underway.
By default the workflow proceeds when one reviewer approves and one rejects. Raise either threshold with Min. approvals and Min. rejections, or switch on Require all reviewers approval for unanimity. Rejections can be required to carry a comment.
Each approval transition supports up to three emails: a reminder for pending reviewers, an email on approval, and an email on rejection. Each has its own subject, rich message body, and recipients (author, owner, last editor, pending reviewers, or specific people). Email message bodies can include placeholder chips for workflow variables, workflow metadata, and page details. Under Advanced, the Approve and Reject button labels can be overridden, which is handy for publishing workflows that prefer “Publish” and “Send back”, or compliance workflows that want “Sign off”.
Selection transitions
Section titled “Selection transitions”A selection transition can point at one target state or several. The single-target case is the most common: a Draft state with a single selection transition into an In Review state, so an author kicks off the workflow when they’re ready for review. The multi-target case covers situations where the next move is a judgment call rather than a gate, letting an author choose between sending a draft to legal review or directly to publishing. Either way, there’s no approval and no waiting; the listed states are the ones a user can move into from here.
Variables and metadata
Section titled “Variables and metadata”Two workflow-level sections are worth knowing. Variables are placeholders usable in many fields that take a user, group, or text, most often an approval’s reviewer list. Instead of hard-coding an approver into a workflow used across many pages, write @page_owner_group and have it resolved per page when the workflow is applied. The Variables section collects every variable Aura Workflows detects and lets you mark each one as required. Variables are read at the moment they become relevant; changing them afterwards has no effect on what already resolved.
Additional Metadata attaches structured fields to every page running the workflow: users, numbers, text, dates, or single-choice select lists. Metadata fields appear in the page sidebar and in the workflow history, making them a good place for things like a ticket number or priority level. Use Add field to define them.
Saving and editing live workflows
Section titled “Saving and editing live workflows”When the unsaved-changes indicator is blue, the workflow isn’t applied to any pages yet and you can save freely. When it turns orange, the workflow is in use and saved changes take effect on those pages immediately. There’s no versioning, so be deliberate: deleting a state or removing a transition can leave existing instances in an awkward position. For larger reshuffles, duplicate the workflow from the workflow list and edit the copy.
Closing the builder with unsaved changes prompts a confirmation before discarding them. Workflows can also be exported to JSON from the workflow list and imported elsewhere, the easiest way to move a finished design between environments.