Your first workflow
This tutorial walks you through building, applying, and running a workflow end-to-end. We’ll use the Basic Approval template, a Draft → In Review → Published flow that’s a fair starting point for most teams. Plan for about ten minutes. You’ll need admin access to the global Aura Workflows app and a page you don’t mind experimenting on.
The goal isn’t to teach the builder in depth. It’s to get a working workflow on a real page so the moving parts click into place. The workflow builder page is the reference once you want to go deeper.
Build the workflow
Section titled “Build the workflow”-
Open Confluence and go to Apps → Aura Workflows → Workflows. This is the global list. Click Create workflow in the top right.
-
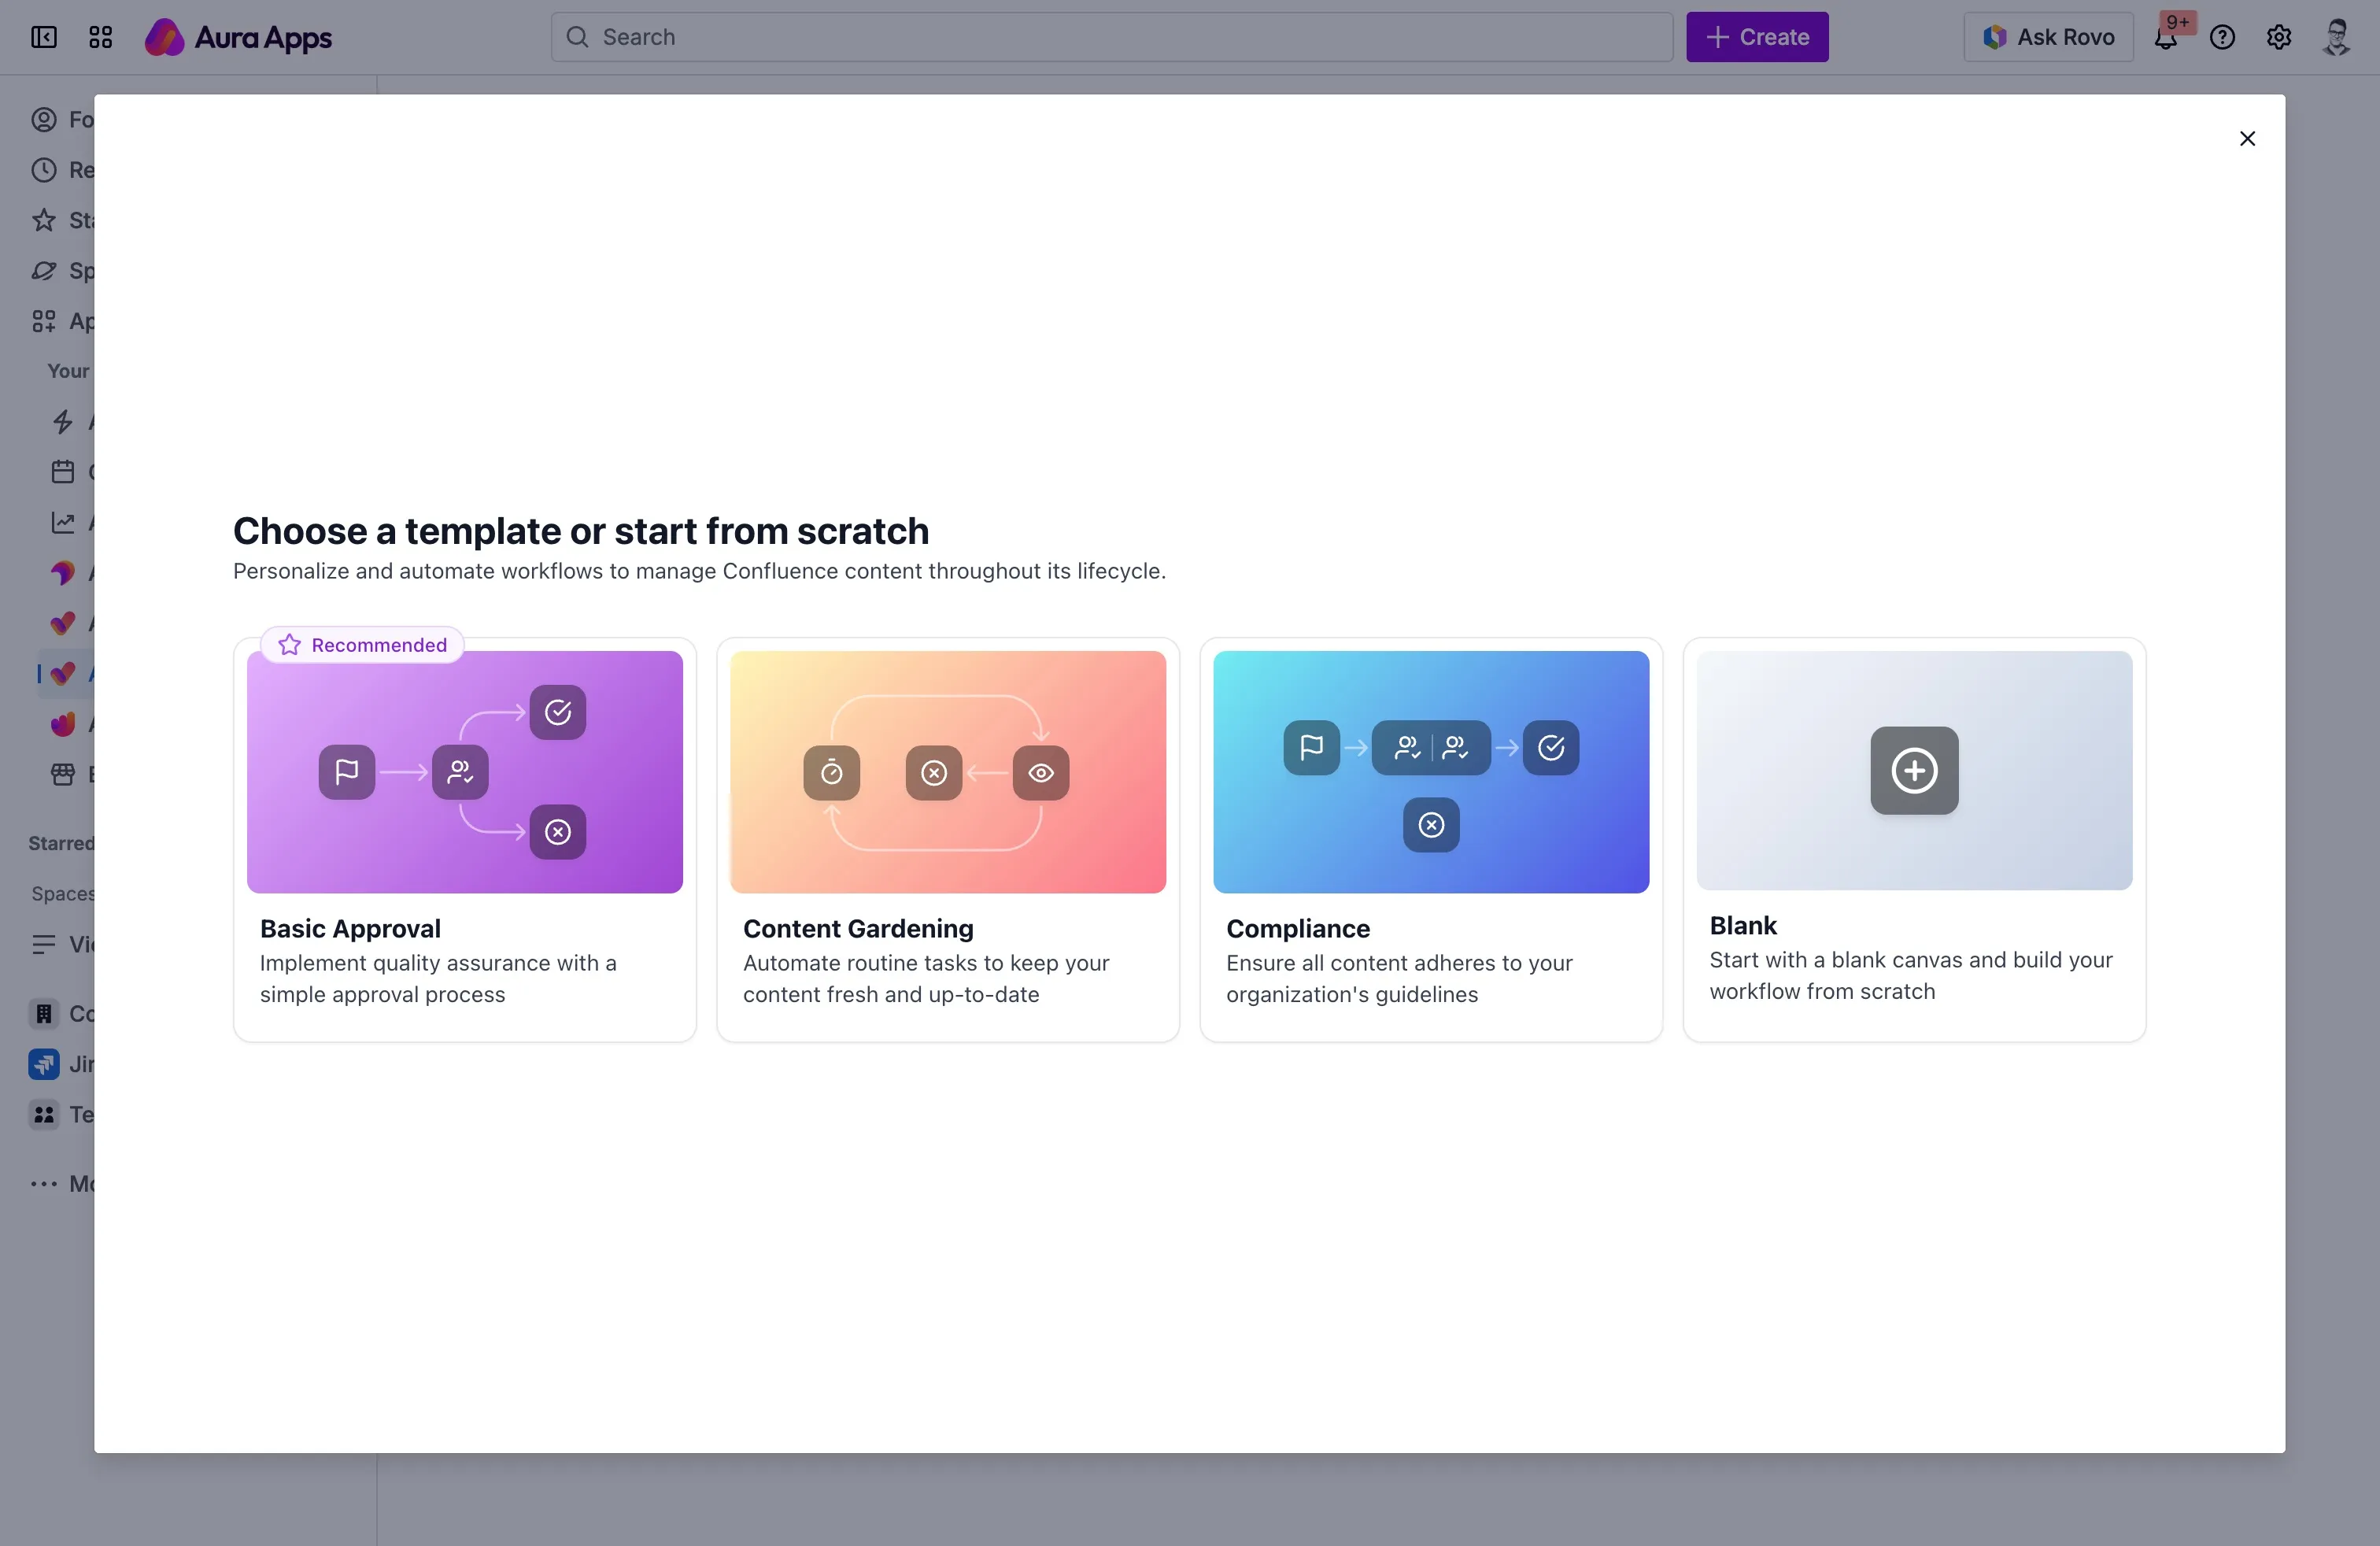
Pick the Basic Approval template. Aura Workflows ships three templates and a Blank option; Basic Approval gives you a Draft state, an In Review state with an approval gate, and a Published state already wired together.
-
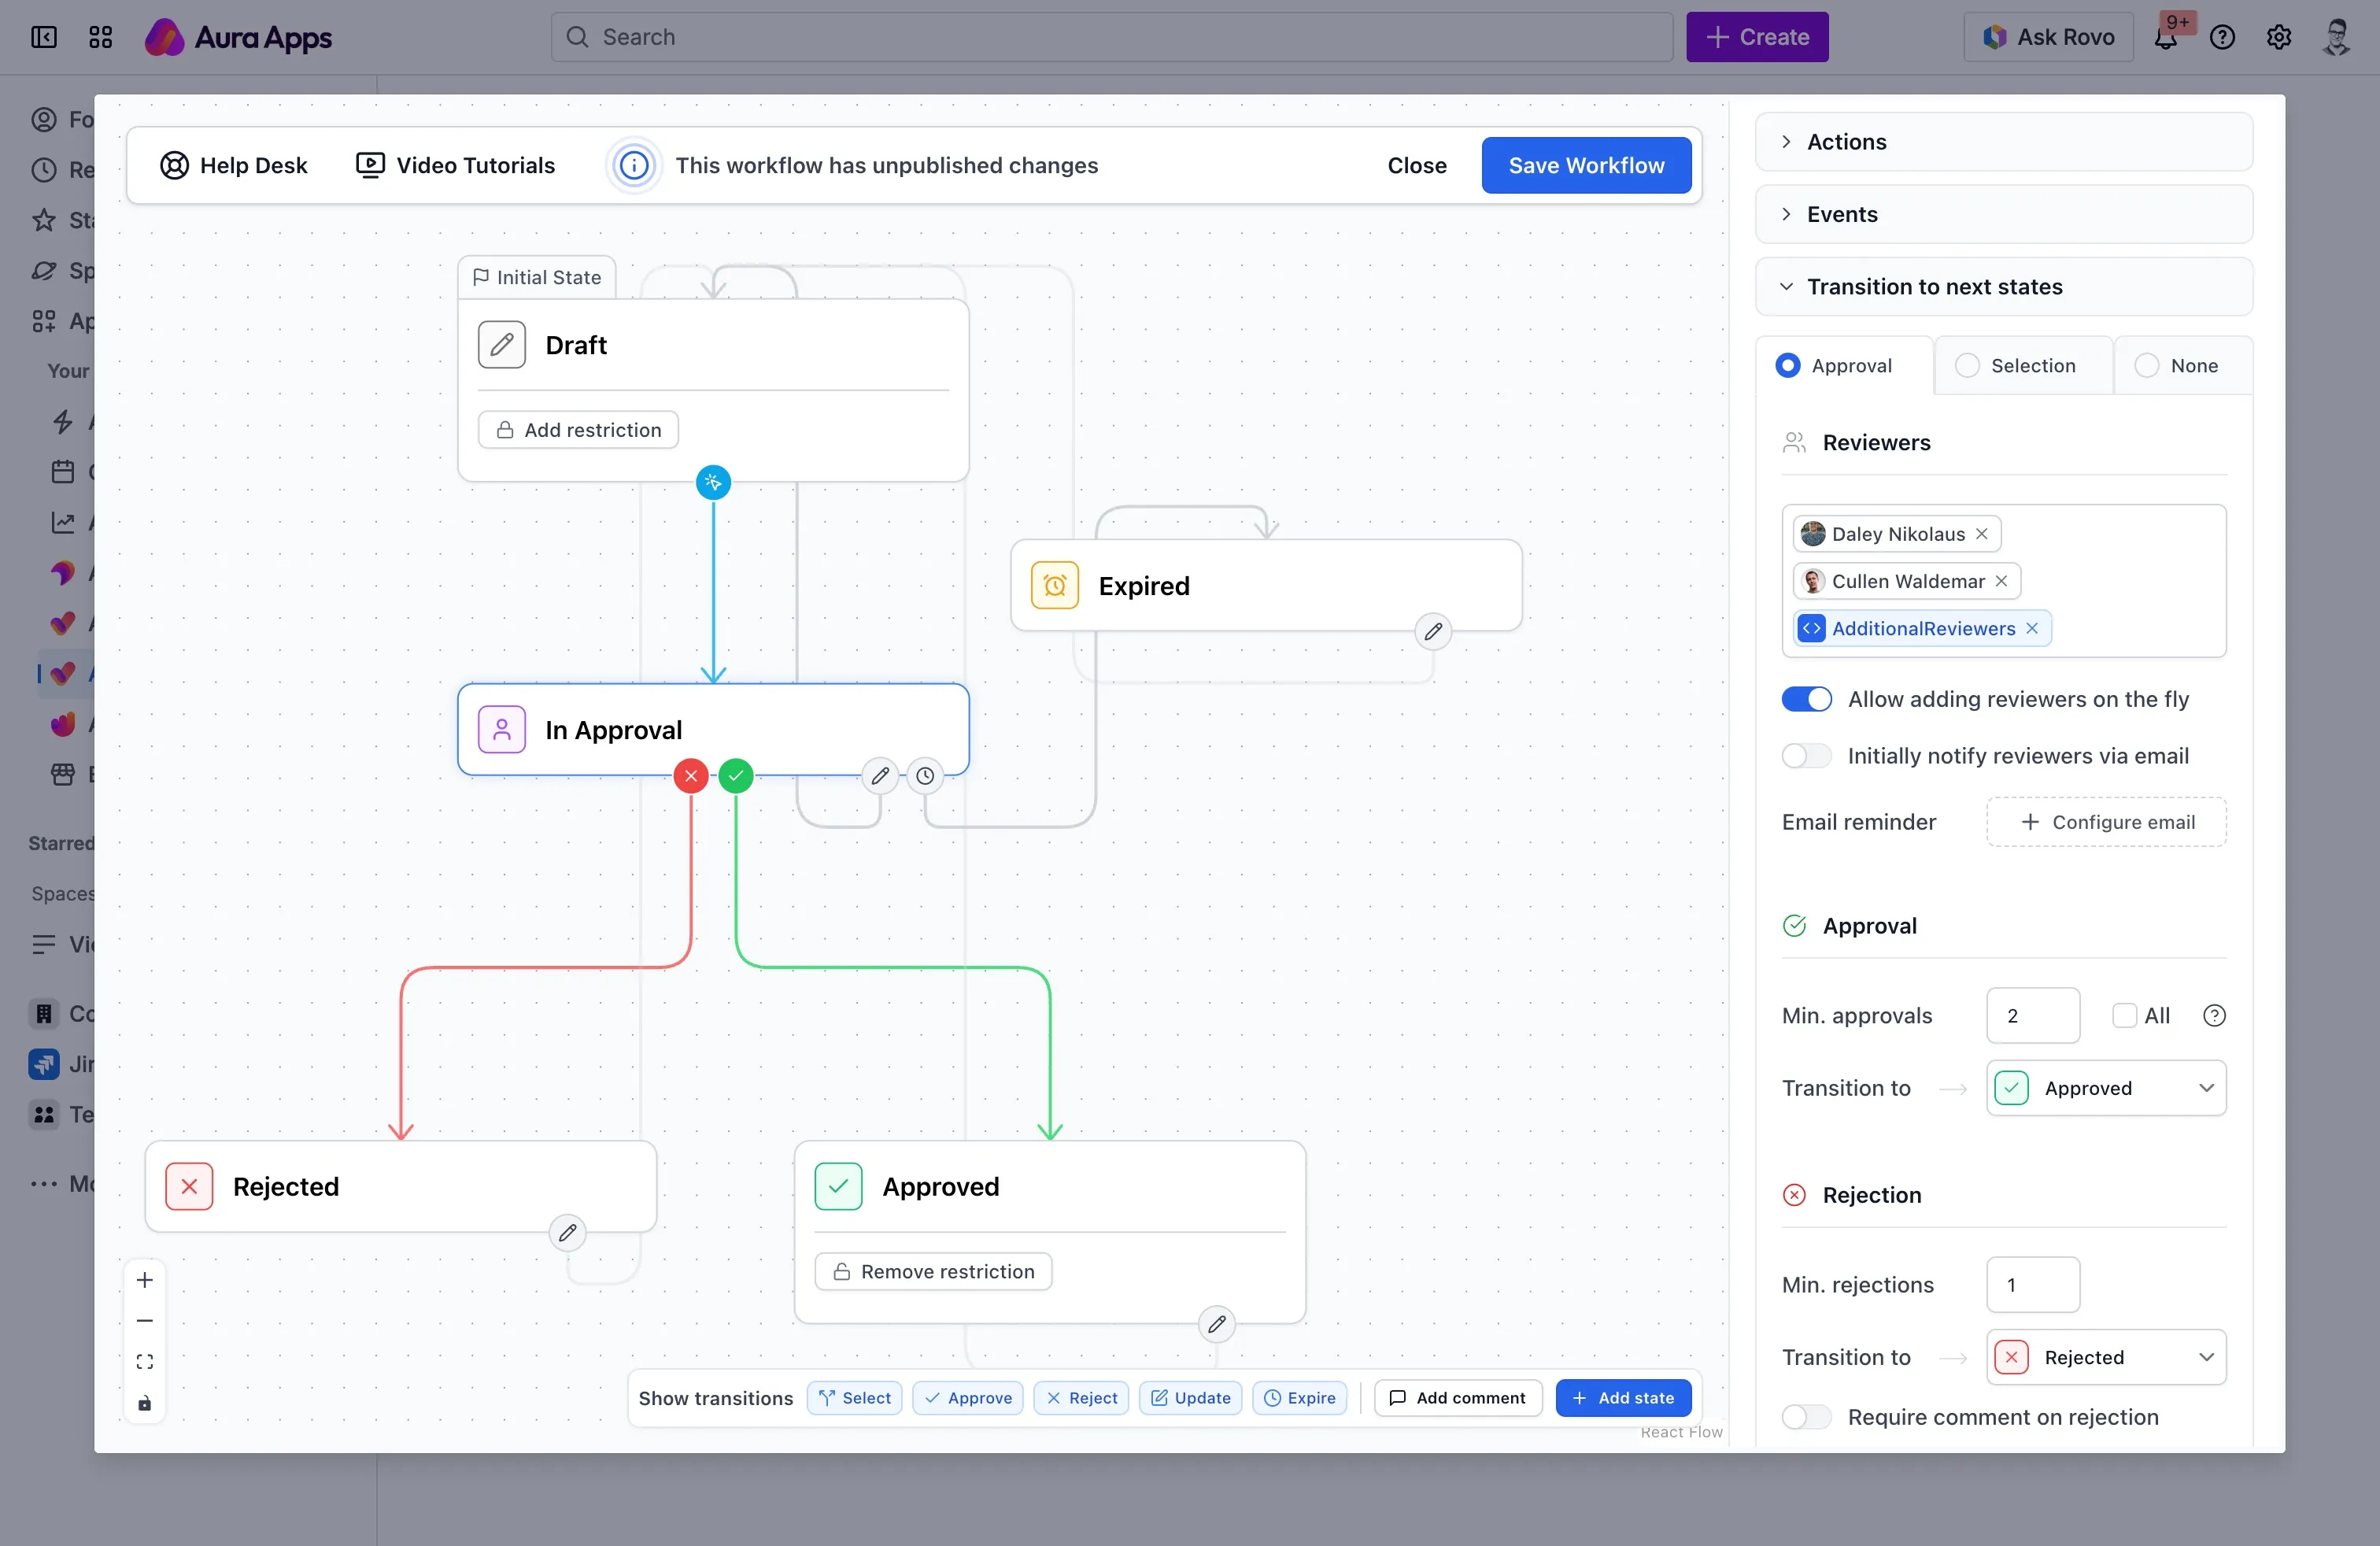
The builder opens with the canvas on the left and a configuration sidebar on the right. Click empty space on the canvas and the sidebar shows workflow-level settings. Set Name to something you’ll recognise, like “Tutorial review”. The description is optional.
-
Take a moment to look at the canvas. You’ll see three states connected by arrows. The arrow out of In Review carries a checkmark icon, which means it’s an approval transition; the X-icon arrow back to Draft is the rejection path. Published is terminal, with no arrows leaving it.
-
Click the In Review state. The sidebar fills with its Actions, Events, and Transition to next states sections. Open the Transition to next states section and you’ll land on the Approval tab, the heart of this template.
-
Find the reviewer field and add yourself, or a teammate, or a group. For your first workflow, a single named user is the easiest thing to verify. Leave Min. approvals at 1 and Min. rejections at 1 for now. If you want the page to wait for everyone, switch on Require all reviewers approval instead.
-
Click Save Workflow in the top right. The unsaved-changes indicator clears. The workflow is now available to apply.
A note on reviewers: the list you just configured is the preassigned set. When a page actually enters In Review, Aura Workflows resolves that list into concrete reviewers at that moment and freezes them on the page. Editing the reviewer list in the builder later doesn’t reach back into approvals already in flight. See approvals for the full timing rules.
Apply it to a page
Section titled “Apply it to a page”Now put the workflow on something. Open any page you control; a scratch page is fine.
-
Look at the byline at the top of the page, just under the title. Aura Workflows adds an Aura Workflows entry there. On a page with no workflow, it shows an Add workflow button.
-
Click Add workflow, pick your tutorial workflow from the picker, and confirm. The page enters the workflow’s initial state, Draft, immediately.
-
The byline updates to show the current state. That’s your handle on the workflow from now on: clicking the state name opens a panel with details, reviewer info, and any action buttons that apply.

If the workflow uses variables, placeholders like @page_owner_group that resolve per page, and any are marked required, you’d be prompted for them before the workflow attaches. The Basic Approval template doesn’t use variables out of the box, so you’ll likely sail past this step. If you do see the prompt, fill in the values it asks for. They’re read at the moment they become relevant (usually when an approval starts) so a value entered now sticks for that resolution.
For applying a workflow to many pages at once, or having Aura Workflows apply one automatically to new pages, see applying workflows.
Move the page through
Section titled “Move the page through”The fun part. With the page in Draft, click the state in the byline to open the panel. You’ll see a button to move the page forward, typically labelled Submit for review, that points at the In Review state.
-
Click Submit for review. The byline updates to In Review, and the panel now shows the reviewer list, vote counts, and a progress indicator. If the approval has an initial-notification email enabled, reviewers get an email at this point.
-
As a reviewer, click Add your review in the panel. A dialog opens with Approve and Reject buttons (or whatever custom labels the workflow uses). Pick Approve, optionally add a comment, and submit.
-
Once your approval crosses the threshold (one approval, with the defaults) the page transitions automatically. The byline flips to Published, any actions on that state run, and the workflow is at its terminal state.
Open the workflow history from the byline panel to see the trail: who applied the workflow, when each transition happened, who approved, and any actions that ran along the way. Viewing status covers the history view in more detail, and reviewing content is the page to point reviewers at when you onboard them.
Where to go next
Section titled “Where to go next”You now have the loop in your head: design in the builder, apply to a page, move through transitions. From here, the natural next steps are adding actions to a state (publishing across spaces, applying labels, sending custom emails), defining variables so one workflow can serve many teams, or setting an expiration so published pages get reviewed again on a schedule. The workflow builder reference is where each of those lives.